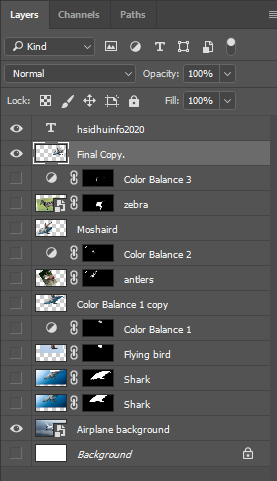
STEPS:
- I started with a layer mask on the Shark, Bird, and Moose to cut out the background - refined it with the paint brush (using black)
- I then cloned away certain parts of the animal and connected them to each other wherever it fit
- Create an adjustment layer to colour balance the bird and moose to try and match it to the shark - but erase away the excess colour and blended it in using the eraser tool and changed the opacity- on the adjustable layer
- bright areas of the shark, bird, and bird with the DODGE tool
- burn in extra shadow on the shark layer with the BURN tool
- I duplicated all 3 layers - hid the originals - then merged the copies (merge visible) - rename Moshaird
- Select the Moshaird- selection tool then mask it
- add a new background layer under the Moshaird layer - ctrl-click new layer button
- insert or copy paste in the new background layer
- adjusted the Moshaird size as necessary
- added watermark
|


No comments:
Post a Comment